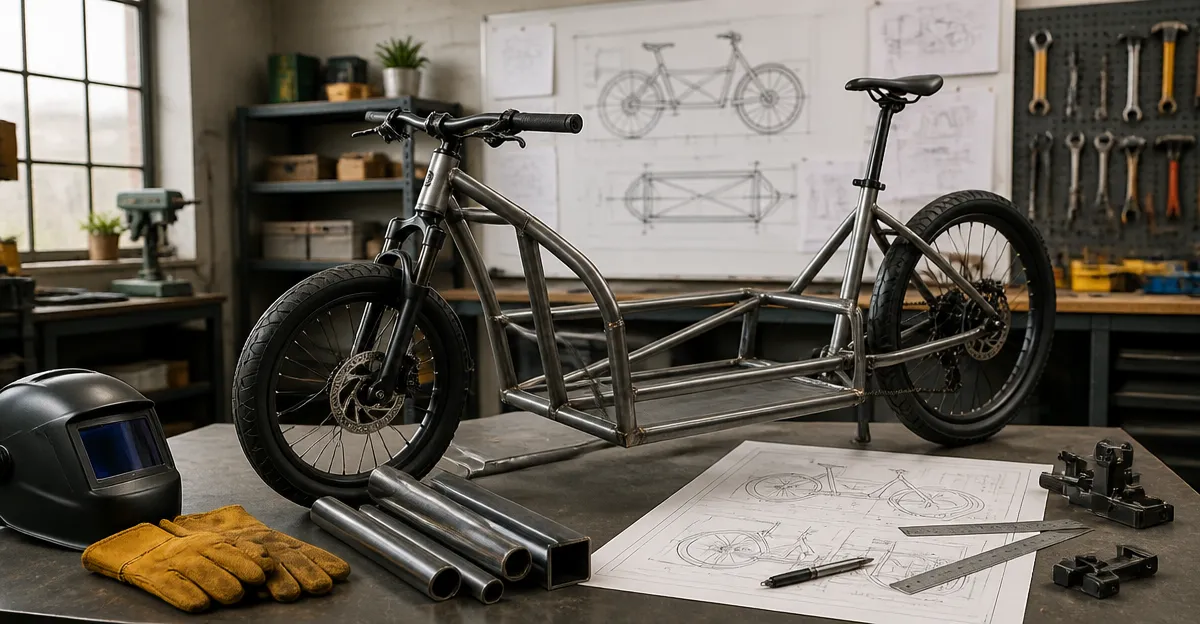
Budget Cargo Bike Frame Design Guide for Small Shops — Step‑by‑Step DIY Plans, Materials & Cost‑Saving Tips
Introduction
This guide explains how a small workshop can design and fabricate a reliable cargo bike frame without exceeding a modest budget. Readers will learn essential frame geometry, material selection, fabrication techniques, and how to integrate rear cargo racks that add utility. The guide also presents real‑world product recommendations that complement the frame design and improve overall performance. By following the step‑by‑step instructions, a shop owner can deliver a market‑ready cargo bike in a short development cycle.
Background and Context
Cargo bicycles have become an essential solution for last‑mile deliveries, family transport, and urban logistics. Compared with motorized vans, a well‑designed cargo bike reduces emissions, parking costs, and maintenance overhead. Small shops often lack access to expensive CNC equipment, yet they can still produce high‑quality frames using conventional welding and tubing techniques. Understanding the load paths, rider ergonomics, and the interaction between frame and rear rack is crucial for a safe and durable product.
Two primary frame families dominate the market: step‑through (low‑top) frames for easy mounting and traditional diamond frames for maximum stiffness. For budget projects, a diamond frame built from 6061‑T6 aluminum or low‑cost chromoly steel offers an excellent balance of weight, strength, and manufacturability. The choice of rear rack influences the frame’s rear triangle design, as the rack must attach securely to the seat stays and rear dropouts.
Designing the Frame Geometry
Start with a geometry template that matches the intended wheel size, typically 26‑inch to 29‑inch for mountain‑style cargo bikes. Key measurements include head tube angle (70‑73°), seat tube angle (73‑75°), chainstay length (440‑460 mm), and bottom bracket height (250‑280 mm). A longer chainstay improves stability when the bike carries heavy loads, while a slightly slacker head tube angle enhances low‑speed maneuverability.
Use a CAD program or hand‑drawn sketches to visualise the tube intersections. Ensure there is at least 30 mm clearance between the rear tire and any rear rack mounting points. Incorporate eyelets for brake cables and a reinforced rear dropout that can accept a quick‑release axle if the shop plans to offer interchangeable wheels.
Selecting Materials and Structural Components
For a budget build, chromoly steel (e.g., 4130) provides high tensile strength at a lower cost than aerospace‑grade aluminum. Steel welds are forgiving, allowing a small shop to use a MIG or TIG welder without specialised equipment. If weight is a primary concern, 6061‑T6 aluminum is an alternative, but it requires a more precise welding process to avoid heat‑affected weakening.
Typical tube dimensions for a cargo frame include 31 mm diameter top tube, 28 mm down tube, and 22 mm seat tube, all with a wall thickness of 1.5 mm to 2 mm. Reinforce the rear triangle with gusset plates at the junction of the seat stays and chainstays. These plates can be cut from 2 mm steel sheet and welded to distribute stress when the rear rack bears heavy loads.When budgeting, source tubing from local steel distributors that offer scrap‑size cuts. Purchasing in bulk reduces per‑kilogram cost, and many suppliers provide pre‑cut lengths that match common geometry templates.
Integrating Rear Cargo Racks
The rear rack is the primary load‑bearing component for cargo bikes. Selecting a rack that matches the frame’s load capacity and mounting style prevents premature failure. The following products have been evaluated for compatibility with the described frame geometry.
- WEEROCK Adjustable Rear Bike Rack – offers universal fit for 20‑29 inch wheels, 15 kg (33 lb) capacity, and a reflective hanger for night safety. Its steel construction complements a chromoly frame and the front‑and‑back position adjustment simplifies alignment with the seat stays.
- Ventura Universal Carrier Rack – provides a 10 kg (22 lb) capacity, includes a spring‑flap reflector, and uses a simple 3 mm hex wrench for assembly. The rack’s steel bars are robust enough for light‑to‑moderate loads on a budget frame.
- Outtag Aluminum Rear Bike Rack – constructed from hard‑aluminum alloy, supports up to 25 kg (55 lb), and features an adjustable shelf that retracts for storage. Its lightweight nature reduces overall bike mass while still delivering high load capacity.
- ROCKBROS Quick Release Rear Bike Rack – high‑strength aluminum alloy with a 55 lb capacity, quick‑release clamps, and dual‑W side rails that keep panniers away from the wheel. The rack’s three‑point fixation aligns well with reinforced seat stays.
- Ibera Touring Bike Rack Plus+ – TIG‑welded anodized aluminum, rated for 25 kg (55 lb), includes a disc‑brake compatible mount, and offers a quick‑release bag system. This rack is ideal for shops that intend to sell a premium cargo bike with integrated pannier solutions.
Comparison and Selection Guide
| Product | Material | Load Capacity | Key Feature | Rating |
|---|---|---|---|---|
| WEEROCK Adjustable Rear Bike Rack | Carbon steel | 15 kg / 33 lb | Front‑and‑back position adjustment, reflective hanger | 4.5/5 (34 reviews) |
| Ventura Universal Carrier Rack | Steel | 10 kg / 22 lb | Included hex wrench, spring‑flap reflector | 4/5 (8,073 reviews) |
| Outtag Aluminum Rear Bike Rack | Hard aluminum alloy | 25 kg / 55 lb | Retractable shelf, adjustable mounting rod | 4.4/5 (515 reviews) |
| ROCKBROS Quick Release Rear Bike Rack | Aluminum alloy | 25 kg / 55 lb | Quick‑release clamps, dual‑W side rails | 4.5/5 (757 reviews) |
| Ibera Touring Bike Rack Plus+ | Anodized aluminum | 25 kg / 55 lb | Disc‑brake compatible, quick‑release bag system | 4.5/5 (5,952 reviews) |
When choosing a rack for a budget cargo bike, consider the intended cargo weight, the frame material, and the ease of installation. Steel racks such as the WEEROCK and Ventura models pair naturally with steel frames, while aluminum racks like Outtag, ROCKBROS, and Ibera are better suited for aluminum frames to avoid galvanic corrosion. For shops targeting higher‑end customers, the Ibera Plus+ offers the most comprehensive accessory ecosystem.
Step‑by‑Step Fabrication Plan
- Prepare a detailed drawing of the frame geometry, including tube lengths, angles, and rack mounting points.
- Cut the tubing to the specified lengths using a pipe cutter or band saw. Deburr all cut edges.
- Fit the tubes together on a jig to verify alignment. Adjust the jig until the chainstay‑to‑seatstay clearance meets the chosen rack’s specifications.
- Weld the main triangle using a MIG welder for steel or a TIG welder for aluminum. Apply a fillet weld of at least 6 mm on each joint for strength.
- Attach gusset plates to the rear triangle, then drill and tap holes for the rack’s mounting bolts. Use a 5 mm (M5) tap for steel racks and a stainless steel M5 bolt for aluminum racks.
- Install the chosen rear rack, ensuring the reflective elements face rearward and the load‑bearing brackets are level with the ground.
- Apply a protective finish: powder‑coat steel frames in matte black, or anodize aluminum frames for corrosion resistance.
- Perform a load test by applying 80 % of the rack’s rated capacity and riding over a short bump course. Verify that no frame deformation occurs.
Best Practices & Cost‑Saving Tips
- Source reclaimed steel tubing from local bike shops or demolition sites; it often meets strength requirements at a fraction of the price.
- Standardise on a single tube diameter (e.g., 28 mm) to reduce the number of jigs and simplify welding fixtures.
- Use lock‑nut washers rather than nylon lock‑nuts when assembling racks; they provide reliable vibration resistance without the risk of plastic degradation.
- When installing a steel rack on an aluminum frame, place a thin polymer shim between the contact surfaces to prevent galvanic corrosion.
- Combine multiple small orders of hardware (bolts, washers, brackets) into a single bulk purchase to obtain volume discounts.
- Document every weld joint with a photo and a note on the weld size; this practice speeds up quality inspections and warranty handling.
Frequently Asked Questions
1. What is the minimum wall thickness required for a cargo bike frame?
A wall thickness of 1.5 mm for steel and 1.2 mm for 6061‑T6 aluminum is generally sufficient to support the loads specified for the racks listed in this guide.
2. Can I use a steel rack on an aluminum frame without causing corrosion?
Yes, provided a non‑conductive shim or a protective coating is applied between the steel rack and the aluminum tube. This barrier prevents galvanic interaction.
3. How many kilograms of cargo can a typical budget cargo bike carry?
When paired with a 25 kg (55 lb) capacity rack such as the Outtag or ROCKBROS model, a well‑designed frame can safely transport up to 20 kg (44 lb) of cargo while maintaining stable handling.
4. Is a quick‑release axle necessary for cargo bikes?
A quick‑release axle simplifies wheel removal for maintenance, but it is not mandatory. For heavy loads, a thru‑axle with a robust dropout may offer increased stiffness.
5. What tools are essential for assembling the rear rack?
The basic toolkit includes a 5 mm Allen key, a 6 mm wrench, a torque wrench set to 5–7 Nm for M5 bolts, and a set of lock‑nut washers. Some racks, such as the Ventura model, also require a 3 mm hex wrench.
6. How can I test the finished cargo bike for safety?
Perform a static load test by placing 80 % of the rack’s rated weight on the carrier and checking for frame flex. Follow with a dynamic test on a short, uneven surface while riding at a moderate speed.
Conclusion
This guide has outlined the essential steps for a small shop to design, fabricate, and finish a budget‑friendly cargo bike frame. By understanding geometry, selecting appropriate materials, and integrating a compatible rear rack, a workshop can produce a reliable product that meets the needs of urban commuters and delivery services. The cost‑saving strategies and best‑practice checklist ensure that the project remains financially viable while maintaining high quality. With the recommended products and the detailed fabrication plan, a small shop can confidently launch a cargo bike line that competes in today’s growing sustainable‑transport market.
Products Featured in This Guide
WEEROCK Adjustable Rear Bike Rack
Price: $25.99 – Rating: 4.5/5 (34 reviews). Featured because its steel construction and adjustable positioning integrate seamlessly with a budget steel frame, and it provides a reflective safety element.
Ventura Universal Carrier Rack
Price: $19.95 – Rating: 4/5 (8,073 reviews). Featured as an affordable steel option for light‑to‑moderate loads, suitable for entry‑level cargo bikes.
Outtag Aluminum Rear Bike Rack
Price: $25.99 – Rating: 4.4/5 (515 reviews). Featured for its high load capacity (55 lb) and retractable design, which reduces overall bike weight.
ROCKBROS Quick Release Rear Bike Rack
Price: $34.99 – Rating: 4.5/5 (757 reviews). Featured because of its quick‑release clamps and side‑rail protection, which enhance user convenience and safety.
Ibera Touring Bike Rack Plus+
Price: $49.99 – Rating: 4.5/5 (5,952 reviews). Featured as a premium aluminum rack with disc‑brake compatibility and a quick‑release bag system, ideal for higher‑end cargo bike builds.