How to Measure Bike Rack Compatibility Without Tools: Accurate No‑Tool Guide for Cars & Bikes
Introduction
One often wonders how to determine whether a bike rack will fit a particular vehicle and bicycle without reaching for a tape measure or a socket set. This guide explains a systematic approach that relies only on visual estimation, common reference points, and simple body measurements. One will learn how to verify hitch class, receiver dimensions, frame clearance, and load capacity using nothing more than a piece of paper and the vehicle itself. The knowledge gained will enable confident purchasing decisions and safe installation for any adventure.
What You Will Need
- A printed copy of the vehicle’s owner manual (optional for reference)
- A sturdy piece of cardboard or a standard sheet of printer paper
- A pen or marker for noting measurements
- Access to the vehicle’s rear hitch area
- Retrospec Lenox 2‑5 Bike Hitch Rack (recommended for step three)
Step 1: Identify the Hitch Class
The first step is to confirm whether the vehicle is equipped with a Class III or Class IV hitch, as the recommended rack requires a 2‑inch receiver of this size. One can locate the hitch by standing directly behind the vehicle and looking for a rectangular opening on the frame; the opening will be either 1.25 inches (Class I/II) or 2 inches (Class III/IV). If the opening is clearly larger than an inch and a half, it is safe to assume a 2‑inch receiver. Visual confirmation is sufficient because the dimensions are standardized across manufacturers.
Why this matters is that a mismatched hitch class can lead to insecure mounting, increased vibration, and potential damage to both the rack and the vehicle. By ensuring the correct class, one eliminates the need for adapters, which can introduce additional points of failure. This verification step also prepares the user for the next phase of measuring the receiver width.
Step 2: Measure the Receiver Width Without Tools
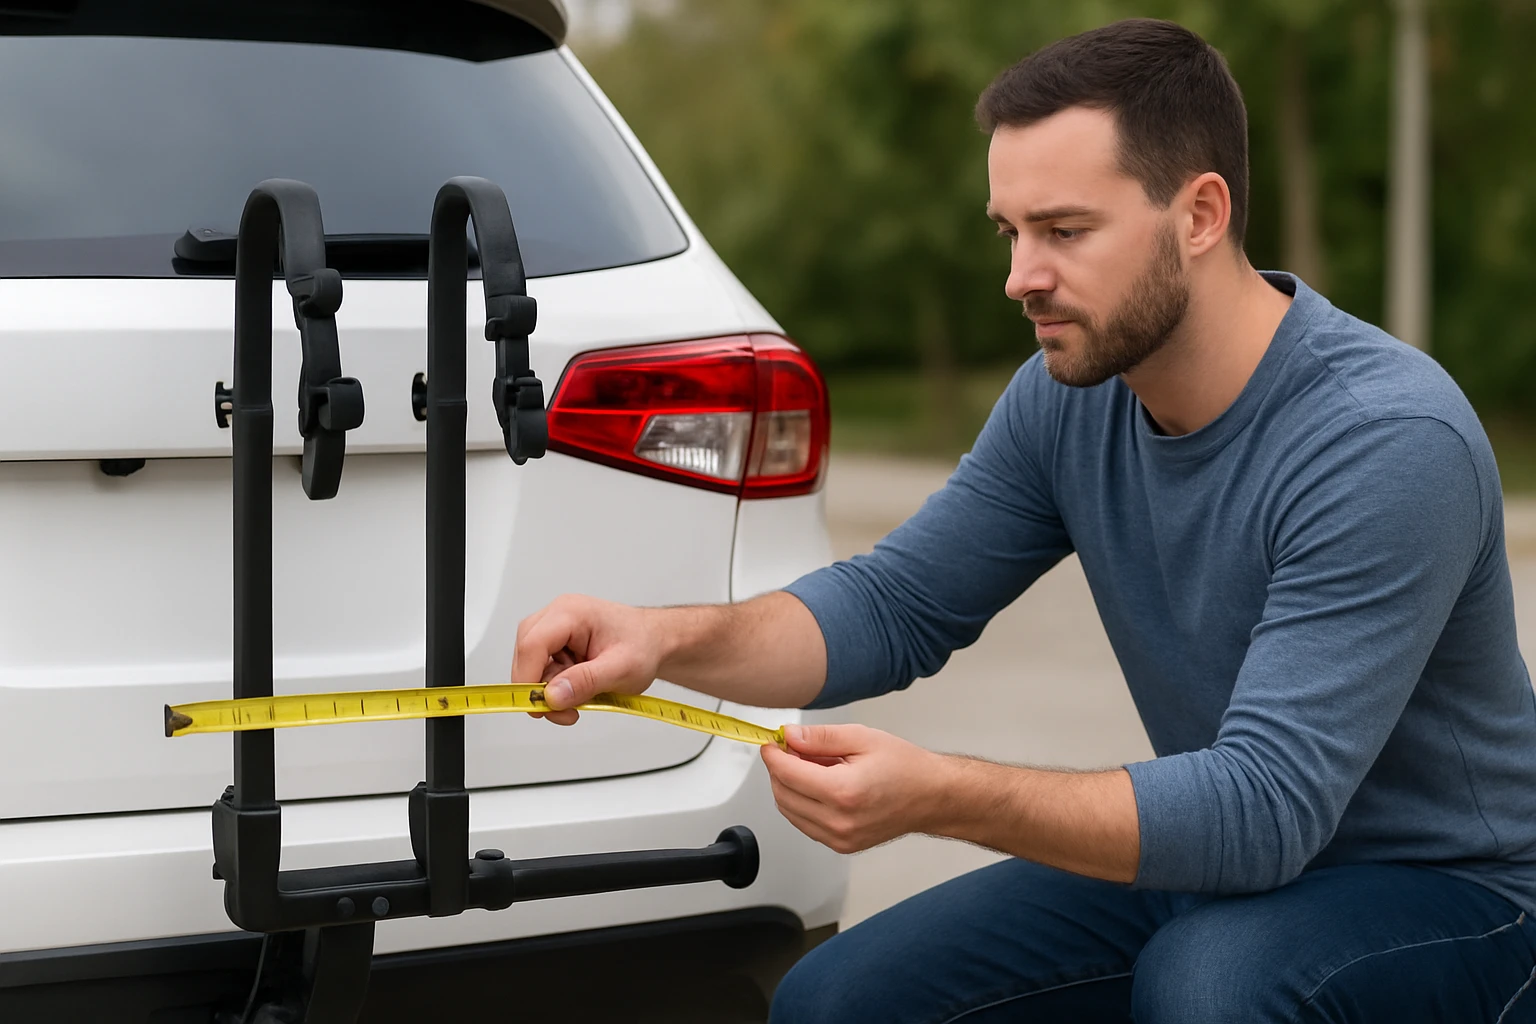
Although a ruler is not required, one can estimate the width of the receiver by using a standard sheet of printer paper, which measures 8.5 inches by 11 inches. Hold the paper horizontally against the opening and note how many paper widths span the interior space. Two full paper widths (approximately 17 inches) will cover a 2‑inch receiver, while a single width will indicate a smaller opening. This visual technique provides a reliable approximation for most users.
It is important to confirm that the paper does not protrude beyond the edges of the receiver, as this would indicate an over‑estimation. If the paper fits snugly with minimal overhang, the vehicle possesses a compatible 2‑inch receiver. This simple visual test eliminates the need for a caliper or measuring tape while still delivering accurate information.
Step 3: Determine Bike Frame Clearance
Next, one must assess whether the selected rack can accommodate the specific bicycles that will be transported. The Retrospec Lenox 2‑5 Bike Hitch Rack offers foldable steel arms that position each bike within individual cradles, providing ample clearance for road, mountain, and hybrid frames. By placing a bicycle next to the empty hitch area, one can visually compare the frame’s width and wheel diameter to the space that the rack’s arms will occupy when folded down.
The anti‑rattle adapter incorporated in the rack reduces road noise and prevents frame movement, which is especially beneficial for larger mountain bikes. The secure tie‑down system includes straps that wrap around the top tube and down tube, ensuring that each bike remains stable throughout the journey. The product is priced at $79.99, carries a rating of 4.3 out of 5 stars based on 1,714 reviews, and is currently in stock, making it a practical solution for users seeking a reliable, no‑tool installation experience.
Step 4: Verify Load Capacity and Family Needs
One should also consider the total weight of the bicycles that will be loaded onto the rack. The Retrospec Lenox 2‑5 Bike Hitch Rack is engineered to support up to two adult bicycles, typically totaling around 70 pounds. By estimating the weight of each bike (most road bikes weigh between 20‑25 pounds, while mountain bikes range from 25‑30 pounds), one can ensure that the combined load does not exceed the rack’s specifications.
If the household requires transport of three or more bikes, alternative solutions such as a roof‑mount rack or a larger trailer‑mount system may be more appropriate. However, for most families with two bicycles, the recommended rack provides a balance of capacity, ease of use, and cost‑effectiveness.
Step 5: Install the Rack and Perform a Test Run
Installation of the Retrospec Lenox 2‑5 Bike Hitch Rack does not require any tools because the rack features a foldable steel frame that slides directly onto the 2‑inch receiver. One simply lifts the rack, aligns the hitch pins with the receiver holes, and pushes until the pins click into place. The anti‑rattle adapter automatically engages, reducing vibration without additional adjustments.
After securing the rack, one should place a bicycle into each cradle, thread the provided straps through the tie‑down loops, and tighten them by hand until they feel snug. A short test drive of approximately five minutes at moderate speed will reveal any excess movement or noise. If the bikes remain stable and the rack does not produce rattling, the installation is successful. Otherwise, the user can readjust the straps or ensure that the anti‑rattle adapter is fully seated.
Tips & Pro Tips
- Always double‑check that the vehicle’s hitch class matches the rack’s requirements before attempting installation.
- Use a piece of cardboard to simulate the width of a bike frame if the actual bicycle is not immediately available.
- When loading the bikes, position the heavier bicycle on the side closest to the vehicle’s centerline to improve weight distribution.
- Inspect the tie‑down straps for wear before each trip; replace any frayed straps to maintain safety.
- For winter travel, consider adding a waterproof cover to protect the bikes from snow and moisture.
Troubleshooting
Problem: The rack does not sit flush on the receiver.
Solution: Ensure that the hitch pins are fully inserted and that the anti‑rattle adapter is engaged. If the receiver is dirty, clean it with a cloth before re‑installing.
Problem: Excessive bike movement during travel.
Solution: Re‑tighten the tie‑down straps and verify that each strap is positioned over the correct tube of the bike frame. The anti‑rattle adapter should be checked for proper placement.
Conclusion
One has now learned how to assess bike rack compatibility without the use of tools, by confirming hitch class, estimating receiver width, evaluating bike clearance, and checking load capacity. The guide also demonstrated how the Retrospec Lenox 2‑5 Bike Hitch Rack simplifies installation through its foldable frame and anti‑rattle adapter, providing a reliable and affordable solution for two‑bike transport. By following the steps outlined, readers can make informed purchasing decisions, ensure safe mounting, and enjoy worry‑free cycling adventures.
Products Mentioned in This Guide
Frequently Asked Questions
How can I identify my vehicle's hitch class without using a tape measure?
Visually compare the hitch opening to standard class diagrams (Class I ~1.25", Class II ~2", Class III ~2"‑2.5") and note the shape of the receiver.
What’s a quick way to check receiver dimensions using just a sheet of paper?
Place a standard 8.5" × 11" sheet against the receiver; if the paper fits fully inside, the receiver is at least 2" wide, indicating a Class II or higher.
How do I estimate frame clearance for my bike without tools?
Sit on the bike, align the rear wheel with the rack’s mounting points, and ensure the top tube clears the vehicle’s rear bumper by at least a finger’s width.
Can I gauge a rack’s load capacity without a scale?
Refer to the rack’s listed capacity in the manual and compare it to the combined weight of your bikes; if the total is well below the rating, it’s safe.
What common mistake should I avoid when measuring bike rack compatibility without tools?
Don’t rely solely on visual guesswork—use a piece of cardboard or paper to confirm dimensions and double‑check hitch class to prevent mismatched installations.