Introduction
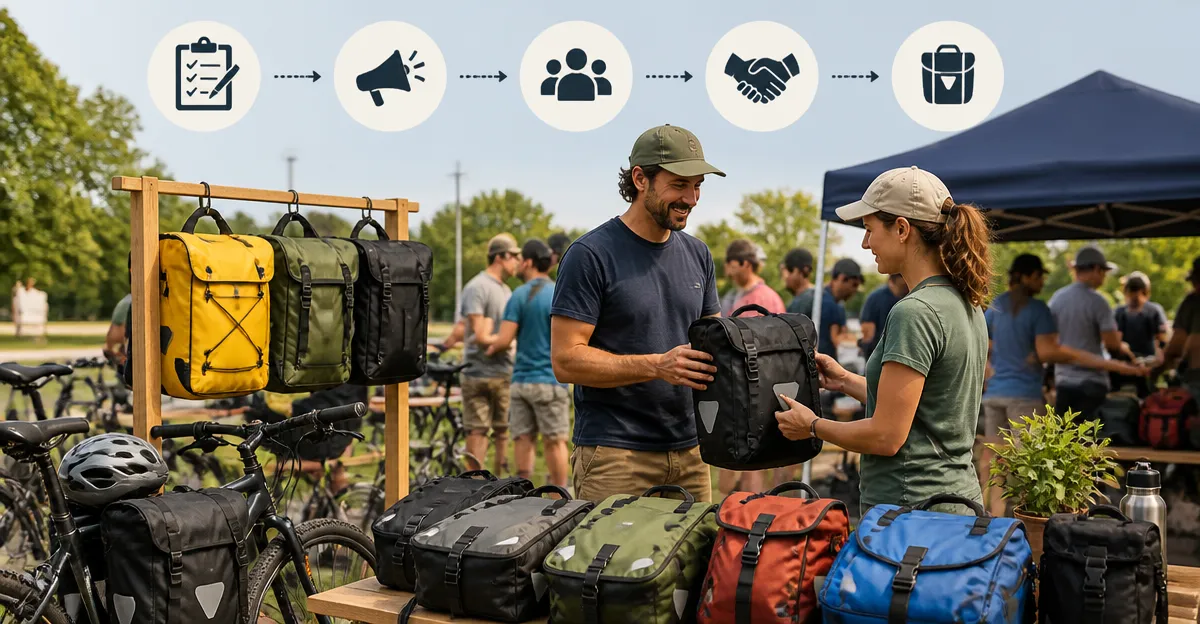
Organizing a pannier swap meet offers cyclists a sustainable way to refresh their gear while building community. This guide explains every phase of the process, from selecting a venue to post‑event follow‑up, so that readers can host an event that runs smoothly and leaves participants eager for the next one. By following the outlined steps, one will learn how to manage logistics, promote attendance, and create a safe swapping environment. The value of a well‑executed swap lies in reduced waste, cost savings, and the joy of discovering a perfectly suited bag that might otherwise be missed.
What You’ll Need
- Venue space (community center, park pavilion, or bike shop floor)
- Tables and chairs for registration and display
- Signage and price‑tag stickers
- Basic tools (screwdriver, zip‑tie cutter) for quick adjustments
- Protective gear for rain or sun (canopies, tarps)
- Reference pannier bags to demonstrate fit and durability:
Step 1: Choose a Suitable Venue
The first major decision is the location, because accessibility determines attendance. Select a space that offers level flooring, easy bike‑rack access, and shelter from weather; community centers often provide tables and electricity at low cost. Verify that the venue allows the use of bike racks and that there is sufficient clearance for larger panniers such as the Marscamd 50L Bike Pannier Bag, which expands to 50 L when unzipped. The Marscamd’s expandable design showcases how a single bag can accommodate both daily commuting items and weekend gear, making it an ideal demonstration piece for potential swappers.
When booking, ask about any insurance requirements and the maximum occupancy limit. If the venue has a bike‑friendly layout, participants can keep their bicycles locked nearby, reducing the risk of theft. Finally, confirm that the venue permits the placement of signage so you can display the event schedule and safety reminders.
Step 2: Set a Date and Time that Maximizes Participation
Choosing the right date involves balancing weekend availability with local cycling events that might draw the same crowd. Mid‑spring Saturdays are often optimal because daylight hours are long and weather is moderate. Publish the date at least four weeks in advance to give participants time to gather items they wish to trade.
Consider a two‑hour window (e.g., 10 am–12 pm) to allow early birds to arrive, browse, and negotiate without feeling rushed. If you anticipate a large turnout, schedule a short break halfway through to restock tables and address any logistical issues.
Step 3: Promote the Swap Meet Effectively
Effective promotion ensures a diverse inventory of panniers and accessories. Create a concise flyer that highlights the event’s purpose, date, venue, and a brief list of recommended pannier types. Include a QR code linking to the registration page and embed the following friendly product names to illustrate the quality of items participants might bring:
- KEMIMOTO 34L Bike Pannier Bag
- JXFUKAL Waterproof Bike Rack Bag
- Rhinowalk Waterproof Bike Pannier
Distribute the flyer through local bike shops, cycling clubs, and social‑media groups. Encourage participants to post photos of the panniers they plan to bring; this builds excitement and helps you anticipate space requirements. Mention that the event is free to join, but a small donation to a local bike‑repair nonprofit is appreciated.
Step 4: Organize Registration and Inventory Management
On the day of the swap, set up a registration table near the entrance. Use a simple spreadsheet or a free event‑management app to record each participant’s name, contact information, and a brief description of the pannier(s) they are offering. This record helps resolve disputes and provides a post‑event summary for participants.
Ask each participant to label their items with a numbered tag that corresponds to the spreadsheet entry. For larger bags such as the KEMIMOTO 34L Bike Pannier Bag, note the waterproof rain cover and the obtuse‑angle design that prevents heel strikes; these features are attractive selling points and can be highlighted on the tag.
Step 5: Prepare Swapping Stations
Arrange tables in a U‑shape to allow easy flow of traffic and clear sightlines for all participants. Place a few example panniers on each table to demonstrate proper mounting techniques. The JXFUKAL Waterproof Bike Rack Bag is an excellent example because its hard‑shell construction and quick‑install buckles illustrate how a rigid bag can stay secure on varied rack types.
For each station, provide the following tools:
- Adjustable zip‑ties and Velcro straps for temporary securing
- Allen wrenches for any rack‑specific bolts
- Reflective safety vests for night‑time visibility demonstrations
Include a small demo bike with a rear rack so participants can test fit. Show how the Marscamd 50L Bike Pannier Bag uses internal stiff plates to avoid wheel‑spoke interference, a detail that many riders overlook when selecting a pannier.
Step 6: Facilitate the Swap
Begin the event with a brief welcome speech that outlines the rules: items must be clean, functional, and accurately described; negotiations should be respectful; and all trades are final. Encourage participants to use the inventory tags to locate items of interest quickly.
During the swap, circulate among the tables to answer questions about fit, waterproofing, and capacity. When a participant asks about rain protection, reference the KEMIMOTO’s added waterproof rain cover and its 600D PVC fabric, which received a 4.4‑star rating from over 2,400 reviewers. Emphasize that the rain cover provides an extra layer of defense beyond the bag’s inherent water‑resistant material.
If a dispute arises—such as a disagreement over a bag’s condition—refer back to the original inventory description and, if necessary, mediate a compromise. Keep the atmosphere friendly; the goal is community building, not profit.
Step 7: Post‑Event Follow‑Up
After the swap, send a thank‑you email to all participants, attaching a PDF summary of the items exchanged. Include a short survey to gather feedback on venue, organization, and product recommendations. This data will help refine future events and identify which pannier models were most popular.
Consider posting photos of the event on social media, tagging the brands of the featured panniers. Brands often appreciate user‑generated content and may respond with promotional support for your next swap.
Tips & Pro Tips
- Weather Planning: If rain is forecast, set up a waterproof canopy and highlight the waterproof features of the Rhinowalk Waterproof Bike Pannier, which uses 500D polyester with seam‑sealed construction.
- Safety First: Encourage participants to remove any sharp tools before the swap and to test the reflective strips on bags like the Bushwhacker Omaha Grocery Panniers for night‑time visibility.
- Labeling System: Use color‑coded stickers for different bag capacities (e.g., green for ≤20 L, yellow for 20‑40 L, orange for >40 L) to streamline browsing.
- Extra Seating: Provide a few folding chairs for older cyclists who may need to rest while negotiating trades.
- Community Partnerships: Invite a local bike‑repair shop to offer free quick‑fix stations; they can demonstrate how to adjust straps on the KEMIMOTO or replace a broken buckle on the JXFUKAL.
Troubleshooting
Problem: Some panniers do not fit the rack due to width restrictions.
Solution: Verify rack width before the event. The KEMIMOTO bag fits racks up to 6 inches wide, while the Marscamd accommodates racks up to 7 inches. Provide a measuring tape at the registration table so participants can quickly confirm compatibility.
Problem: Bags become slippery when wet.
Solution: Place non‑slip rubber mats on the tables and remind participants to use the built‑in anti‑slip bases found on the Rhinowalk model.
Conclusion
Hosting a pannier swap meet is a rewarding way to promote sustainable cycling, foster community ties, and help riders discover the perfect bag for their needs. By following the step‑by‑step instructions, utilizing the recommended tools, and applying the pro tips, one can ensure a smooth, enjoyable event from start to finish. The guide has covered venue selection, promotion, inventory management, swapping logistics, and post‑event follow‑up, empowering readers to organize future swaps with confidence.
Remember that the success of a swap depends on clear communication, well‑maintained equipment, and a welcoming atmosphere. With these elements in place, the next pannier swap meet will be an anticipated highlight on the local cycling calendar.
Products Mentioned in This Guide
Frequently Asked Questions
What type of venue is best for a pannier swap meet?
Choose a community center, park pavilion, or bike shop floor that offers enough indoor space, tables, and easy access for cyclists.
Which essential supplies should I gather before the event?
You’ll need tables, chairs, signage, price‑tag stickers, basic tools like screwdrivers, and weather protection such as canopies or tarps.
How can I promote the swap meet to attract participants?
Use local bike clubs, social media groups, flyers at bike shops, and event platforms to share the date, location, and a brief description of the swap.
What safety measures should I implement during the swap?
Provide clear signage, keep the area well‑lit, have a registration desk, and ensure all bags are inspected for damage before display.
What post‑event steps help maintain momentum for future swaps?
Send a thank‑you email, share photos and feedback, and start planning the next meet while collecting suggestions from attendees.