How to Convert a Child’s Bike Trailer into a Sturdy Cargo Trailer: Step‑by‑Step DIY Guide
Introduction
In many households, a child’s bike trailer sits unused once the children outgrow it. Converting that trailer into a cargo carrier can extend its life and provide a low‑cost solution for grocery runs, camping gear, or tools. This guide explains how to transform a standard child trailer into a robust cargo trailer using a few inexpensive components. Readers will learn the necessary tools, the conversion process, and how to enhance safety and visibility for night rides.
What You’ll Need
- A sturdy child bike trailer – for example, the Allen Deluxe Child Bike Trailer.
- Heavy‑duty cargo net or waterproof Oxford bag – the PEXMOR Foldable Bike Cargo Trailer includes a removable cover that can be repurposed.
- Adjustable quick‑release hitch – the universal hitch on the Toolsempire Bike Cargo Trailer works well.
- Reflective LED tail lights – the Nilight Hitch Cargo Light Kit provides visibility.
- Basic hand tools (wrench, screwdriver, drill, zip ties).
- Optional: additional storage pockets or straps for securing irregular loads.
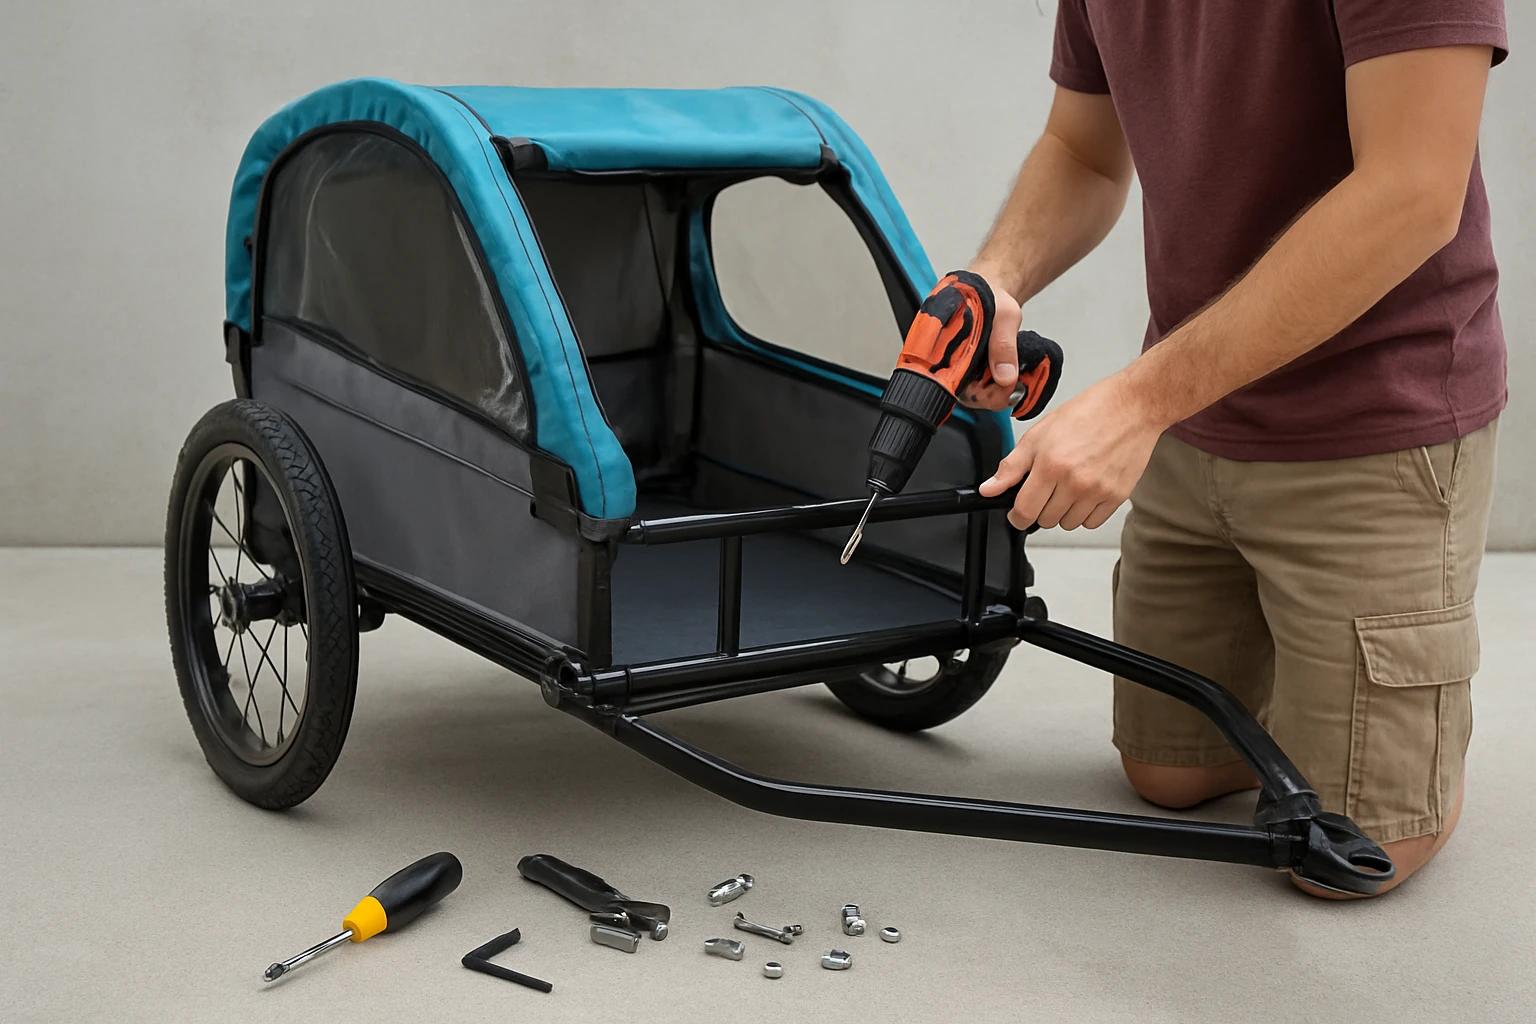
Step 1: Assess the Existing Trailer Frame
The first task is to examine the frame of the child trailer for rust, cracks, or loose welds. The Allen Deluxe Child Bike Trailer features a lightweight steel construction with quick‑release 16‑inch wheels, making it a reliable base for conversion. Verify that the axle bolts are tight and that the hitch mount is intact; a solid connection prevents wobble when carrying heavy loads. If the frame shows signs of fatigue, reinforce it with metal brackets or consider swapping to a more robust chassis such as the Toolsempire Bike Cargo Trailer, which is designed for up to 220 lb.
Step 2: Remove Child‑Specific Components
Next, detach the child‑seat module, safety harness, and any interior padding that is not needed for cargo. The Allen trailer’s five‑point harness can be unscrewed using a standard wrench; keep the hardware in case you need it later. Removing the windows and footguard reduces weight and creates a flat interior surface for stacking boxes or bags. For trailers like the Sepnine Kids Bike Trailer, the ergonomic seats can be folded away, leaving a clear cargo bay.
Step 3: Install a Reinforced Cargo Platform
To support heavier items, install a plywood or aluminum platform that fits within the trailer’s dimensions. Cut a piece to approximately 30 × 20 inches, then secure it to the frame with stainless‑steel bolts. The platform distributes weight evenly across the axle, reducing stress on the wheels. If you prefer a ready‑made solution, the PEXMOR Foldable Bike Cargo Trailer includes a large waterproof Oxford bag that can be placed over a simple platform, providing both protection and a non‑slip surface.
Step 4: Add Secure Fastening Points
Cargo loads must be restrained to avoid shifting during motion. Drill four D‑ring eyelets into the corners of the platform and attach them to the trailer’s existing anchor points. The Toolsempire Bike Cargo Trailer uses D‑rings and adjustable straps, which you can repurpose for the converted trailer. Use high‑strength ratchet straps or cargo nets to tie down boxes, groceries, or camping gear. Ensure that the straps pass over the axle area to keep the center of gravity low.
Step 5: Upgrade the Hitch for Heavy Loads
While the original child‑trailer hitch is adequate for light loads, a universal quick‑release hitch provides greater stability for cargo. The hitch from the Toolsempire Bike Cargo Trailer features a shock‑absorbing spring and fits most 26‑inch and 28‑inch bicycles. Install the hitch by aligning the mounting plate with the rear axle and securing it with the supplied bolts. This upgrade allows you to attach the trailer to a wider range of bikes, including mountain and city models, while reducing vibration.
Step 6: Fit All‑Terrain Wheels (Optional)
If you plan to ride on gravel, sand, or uneven sidewalks, consider swapping the original 16‑inch wheels for larger, puncture‑proof tires. The PEXMOR Foldable Bike Cargo Trailer uses 20‑inch pneumatic wheels with reflective sidewalls, offering smoother rides on mixed surfaces. Replace the wheels by loosening the axle nuts, sliding off the old wheels, and mounting the new ones, making sure the axle spacing matches. Larger wheels improve rolling resistance and increase load capacity without sacrificing maneuverability.
Step 7: Install Visibility Enhancements
Nighttime or low‑light riding demands adequate rear illumination. Attach the Nilight Hitch Cargo Light Kit to the trailer’s rear frame using the provided rubber grommets and zip ties. The kit includes two 6‑inch oval LED lights with ten 3030 chips each, delivering bright red signals that comply with road safety standards. Connect the lights to the bike’s 12 V system using the 82.68‑inch wire harness; the plug‑and‑play design eliminates the need for batteries. Proper lighting not only protects you but also makes the trailer more visible to motorists.
Step 8: Seal the Cargo Area
Weather protection is essential for keeping groceries or tools dry. Use the waterproof cover from the PEXMOR Foldable Bike Cargo Trailer or purchase a separate tarp that can be secured with Velcro straps. Ensure the cover overlaps the front opening and is fastened with buckles to prevent wind from lifting it. If you prefer a hard shell, consider adding a lightweight polycarbonate panel that can be bolted to the platform edges, providing rigid protection while keeping weight low.
Step 9: Test Load Distribution and Braking
Before embarking on a long trip, perform a short test ride with a moderate load (approximately 30 lb). Observe how the trailer tracks; the wheels should follow the bike’s line without wobbling. Check that the hitch remains tight and that the straps hold the cargo securely. If the bike’s brakes feel weaker, adjust the brake lever tension or consider adding a small disc brake module to the trailer’s axle, a feature found on the Toolsempire Bike Cargo Trailer.
Step 10: Final Adjustments and Maintenance
After testing, tighten any loose bolts and verify that the LED lights operate correctly. Lubricate the wheel bearings with a light oil to ensure smooth rotation, especially after adding heavier loads. Store the trailer in a dry place and cover it with the waterproof bag when not in use. Regularly inspect the D‑rings, straps, and hitch for wear, replacing components as needed to maintain safety.
Tips & Pro Tips
- Use a level when installing the cargo platform to prevent tilting.
- Attach a small reflective strip to the front of the trailer for added visibility.
- When loading, place the heaviest items low and centered over the axle.
- Consider adding a small lock hasp to the cargo area if you transport valuable tools.
- For electric bikes, verify that the hitch does not interfere with the motor’s chain or belt.
Troubleshooting
Trailer wobbles during turns
Check that the wheels are properly aligned and that the axle nuts are tightened evenly. If wobble persists, replace the wheels with the larger pneumatic set from the PEXMOR model.
Lights do not illuminate
Confirm that the 4‑pin connector is fully seated and that the bike’s 12 V system is active. Use a multimeter to test voltage at the connector; replace the wire harness if it shows signs of corrosion.
Straps slip under heavy load
Upgrade to ratchet straps with a higher tensile rating (minimum 500 lb) and route them through the D‑rings rather than over the platform edges.
Conclusion
By following these ten steps, one can repurpose a child’s bike trailer into a versatile cargo carrier that serves daily errands, outdoor adventures, and DIY projects. The conversion leverages existing components while adding robust upgrades such as a reinforced platform, universal hitch, and high‑visibility lighting. Readers are encouraged to experiment with different load configurations and to maintain the trailer regularly for long‑term reliability.
Products Mentioned in This Guide
Frequently Asked Questions
What tools are required to convert a child bike trailer into a cargo trailer?
You need basic hand tools like wrenches, a screwdriver, zip ties, and optionally a drill for mounting brackets.
Can I use the original hitch of the child trailer for cargo?
Yes, the original hitch works, but installing an adjustable quick‑release hitch improves loading flexibility and safety.
How do I make the cargo area waterproof?
Fit a waterproof Oxford bag or a heavy‑duty cargo net with a fitted cover to keep items dry during rides.
What safety accessories should I add after conversion?
Add reflective tape, LED lights, and a sturdy tie‑down system to secure loads and increase visibility at night.
Is the converted trailer suitable for heavy loads?
When reinforced with sturdy brackets and a strong hitch, the trailer can safely carry typical grocery or camping loads up to the manufacturer’s weight limit.